Creating a Reusable Database Schema Management NPM Package: A Comprehensive Guide
In a microservice architecture, each service typically defines its own database schema and logic. This approach often leads to:
Crafting a Reusable Database Schema Management NPM Package for Microservices | NodeJs | MongoDB 🚀

Please Note: Advanced Content Ahead 🚨
This blog is best suited for advanced users familiar with transitioning from monolithic architectures to microservices. A good understanding of Node.js and MongoDB is essential. It’s tailored for those already versed in these technologies and architectural concepts.
Tada the Problem 😒
In a microservice architecture, each service typically defines its own database schema and logic. This approach often leads to:
- Repetitive code across services 🔄
- Increased chances of inconsistencies 😵
- Difficulty in managing changes in database schemas 🛠️
Our Solution ⚙️
Centralized Database Schema Management Plugin 🌐
We create a plugin that offered a centralized solution to efficiently manage database schemas across multiple microservices. Key features include:
- Centralized definitions of database schemas and logic 📋
- Easy sharing and reuse of these definitions across services 🔁
- Reduced redundancy and enhanced consistency in your microservice architecture 👍
So let’s jump into the solution, here I am going to give you a walkthrough and approach with all necessary template which you can use and modify for your use case.
Let’s get started 😉
Implementation Steps 👣
1. Setting Up the GitHub Repository 🏗️
- Create a new repository 🔨
- Obtain a personal access token for later use 🔑
- Clone the repository locally to start building 🏡
2. Building and Developing Locally 💻
- Initialize a new NPM project with
npm init🚀 - Carefully craft a
package.jsonfile 📝 - Emphasize the package name, version, and
publishConfig🎯 - version should be change with every publish according to samver convection 🚦
{
  "name": "@{Your_GitHub_username}/{package_name}",
  "version": "1.2.0",
  "description": "A package for MongoDB model schema definitions and connection management",
  "main": "index.js",
  "scripts": {
    "test": "echo "Error: no test specified" && exit 1"
  },
  "repository": {
    "type": "git",
    "url": "git+https://github.com/{Your_GitHub_username}/{package_name}.git"
  },
  "keywords": [
    "mongodb",
    "mongoose",
    "schema",
    "model",
    "database"
  ],
  "author": "Author ",
  "license": "ISC",
  "bugs": {
    "url": "https://github.com/{Your_GitHub_username}/{package_name}/issues"
  },
  "homepage": "https://github.com/{Your_GitHub_username}/{package_name}/#readme",
  "dependencies": {
    "mongoose": "^5.13.7",
    "validator": "^13.0.0",
    "bcryptjs": "^2.4.3"
  },
  "devDependencies": {
    "jest": "^27.0.6"
  },
  "publishConfig": {
    "registry": "https://npm.pkg.github.com/{your_org_or_username}"
  }
}- Authenticate with GitHub Packages using 🔐
npm login --scope=@YOUR_GITHUB_USERNAME --registry=https://npm.pkg.github.com- Use the personal access token you obtained earlier when asked for password on prompt 🗝
3. Structure of the Package 📚
- Create a well-organized directory structure 🗂️
- Directory structure overview 👀
root/
    - index.js
    - package.json
    - .gitignore
    - Readme.md
    - models/
        - plugins/
        - sub-folder/
- model1.model.js- Sample
index.jsfor database connection and model management 🛫
const mongoose = require('mongoose');
const models = require('./models');

class DatabaseService {
    constructor(uri, options = {}) {
        this.uri = uri;
        this.options = options;
        this.models = {};
        this.loadModels();
    }

    async connect() {
        try {
            await mongoose.connect(this.uri, {
                ...this.options,
                useNewUrlParser: true,
                useUnifiedTopology: true
            });
            console.log('Connected to MongoDB successfully');
            this.loadModels();
        } catch (error) {
            console.error('Error connecting to MongoDB:', error.message);
            throw error;
        }
    }

    loadModels() {
        Object.keys(models).forEach((key) => {
            this.models[models[key].name] = models[key].model;
        });
    }

    getModel(modelName) {
        if(!this.models[modelName]) {
            throw new Error(`Model ${modelName} not found`);
        }

        return this.models[modelName];
    }
}

module.exports = DatabaseService;- Sample model file in
models/type1/model1.model.js🗄
const mongoose = require('mongoose');
const { toJSON, paginate } = require('./plugins');

const modelSchema = mongoose.Schema({
    // Your schema here
}, {
   timestamps: true,
    strict: false,
});

modelSchema.plugin(toJSON);
modelSchema.plugin(paginate);

const Model1 = mongoose.model('Model1', modelSchema);
module.exports = {
    name: 'Model1',
    model: Model1
};- Clean module export using the
fsmodule inmodels/index.js:
const fs = require('fs');

const UTILITY_FOLDERS = Object.freeze([
    'plugins',
]);

const exportObject = {};

const getExports = (folderName) => {
    const files = fs.readdirSync(folderName);

    files.forEach((file) => {
        if(file === 'index.js' || UTILITY_FOLDERS.includes(file)) return;

        const stat = fs.lstatSync(`${folderName}/${file}`);
        if(stat.isDirectory()) {
            getExports(`${folderName}/${file}`);
        } else {
            const fileName = file.split('.')[0];
            exportObject[fileName] = require(`${folderName}/${file}`);
        }
    });

    return exportObject;
};

module.exports = getExports(__dirname);
4. Registering and Publishing the Package 🚢
- Commit and push your changes to GitHub 📤
- Publish your package to the NPM registry 🌐
git add .
git commit -m "Initial package setup"
git push
npm publish
That’s it for the building and publishing part of our NPM package. We’ve covered how to set up a GitHub repository, develop the package locally, structure it properly, and finally, register and publish it on the NPM registry. This process ensures that our database schema management tool is not only well-organized but also easily accessible for integration into various projects.
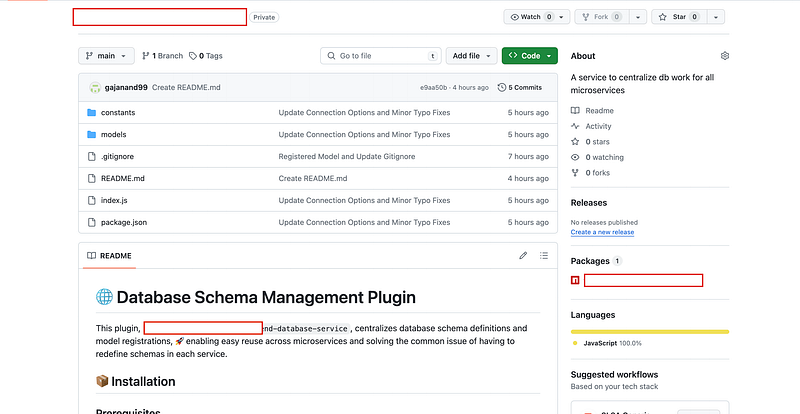
Now you repo should look like this
Consuming the Package 🍴
Now that our package is up and running, let’s dive into how to effectively use it in your microservices architecture. This part of the guide will walk you through the steps to integrate and utilize the package in real-world applications, ensuring that you can leverage its full potential for efficient and consistent database schema management across your services.
1. Setting up .npmrc for Package Consumption 🔧
To use our package, you first need to configure your project to consume packages from GitHub Packages. This is done by setting up an .npmrc file in your project root:
- Create a
.npmrcfile in your project root 📁 - Add the following line to specify your GitHub package registry 🎛️
# Set the registry for scoped packages
@launchpadapps-au:registry=https://npm.pkg.github.com/

# Authentication for GitHub Packages (replace with your actual token for private packages)
//npm.pkg.github.com/:_authToken=YOUR_PERSONAL_ACCESS_TOKEN
2. Importing the Package in package.json 📦
- Add the package as a dependency in your
package.json📈 - Run
npm installto install the package and its dependencies 🛠️
"dependencies": {
  "@Your_Github_Username/your-package-name": "^1.2.0"
}
3. Installing the Package with npm install 🧑💻
With the package added to your package.json, run npm install in your terminal. This command will install the package along with its dependencies into your project 👐.
4. Using the Package in Your Code ✍️
Now that the package is installed, you can start using it in your application. Here’s an example of how you might do this:
- Import the package at the beginning of your JavaScript file ⬇️
const DatabaseService = require('@Your_Github_Username/your-package-name');2. Create an instance of the service 🏛
const dbService = new DatabaseService('your-mongodb-uri', { /* options */ });3. Connect to your database and use the models 📩
dbService.connect()
  .then(() => {
    const User = dbService.getModel('User');
    // Use the User model for database operations
  })
  .catch(err => console.error('Database connection error:', err));
This section covered the necessary steps to consume the newly created NPM package in your project. By setting up .npmrc, adding the package to your package.json 🤗
Additional Steps for Local Debugging 🔍
Local debugging is crucial before you publish or use your package in a production environment. npm link is a powerful tool that allows you to test and debug your package locally. Here's how to use it:
1. Linking the Package Locally 🕵️♂️
- Navigate to the root directory of your package and run:
- This command creates a global link to your package.
npm link2. Linking the Package in Your Project 📌
- In your project where you want to use this package, run:
- This command creates a symlink in your project’s
node_modulesdirectory to your locally linked package.
npm link @Your_Github_Username/your-package-name3. Testing and Debugging 🔭
- Now, you can test your package as if it were installed from the registry. Any changes you make to the package will be reflected in your project.
4. Unlinking the Package ♻️
Once you’re done with local testing and debugging, it’s important to unlink the package:
Unlinking from Your Project 🔻
- This removes the symlink from your project’s
node_modules.
npm unlink @Your_Github_Username/your-package-nameRemoving the Global Link 😌
- Navigate back to your package directory and run:
- This removes the global link to your package.
npm unlinkSummary and Key Takeaways 📝
This comprehensive guide has walked you through the journey of creating, publishing, consuming, and debugging a reusable database schema management NPM package tailored for microservice architectures. Key points to remember:
🎯 Centralization is Key:
- Centralizing your database schema management reduces redundancy and enhances consistency across services.
🤝 Smooth Integration:
- The steps outlined ensure that your package can be smoothly integrated and used in various microservice projects.
✅ Local Debugging:
- Utilizing
npm linkfor local debugging is crucial for ensuring the quality and functionality of your package before wider use.
Join the Conversation! 💬
We hope you found our journey to a more efficient deployment process inspiring and informative. But the conversation doesn’t end here! We’d love to hear from you and learn about your experiences with deployment, troubleshooting, and collaboration.
Share Your Story 📢
Have you encountered deployment challenges similar to ours, or do you have your own unique experiences to share? Whether it’s a deployment triumph or a troubleshooting tale, your story can provide valuable insights to the community.
Ask Questions ❓
If you have questions about the Cloud Run setup, Docker deployment, or any other topic covered in this blog, don’t hesitate to ask. I and fellow readers are here to help you find solutions.
Connect with Us 🌐
Join us on social media, where we regularly share tips, updates, and insights about web development and deployment. Follow us on Twitter, LinkedIn, or Facebook to stay connected with our growing community of developers.
Feedback and Suggestions 📝
We value your feedback! Is there a specific topic you’d like us to explore in future blogs? Do you have suggestions on how we can improve our deployment process even further? Let us know; your input shapes the content we create.
Stay Tuned for More 📅
Don’t miss out on our future blog posts! Subscribe to our newsletter or follow our blog for the latest updates, tutorials, and stories from the world of web development and deployment.
Thank you for joining us on this deployment journey, and we look forward to engaging with you in the comments, on social media, and in future blog posts. Together, we can make deployment easier and more efficient for everyone! 🚀🌐